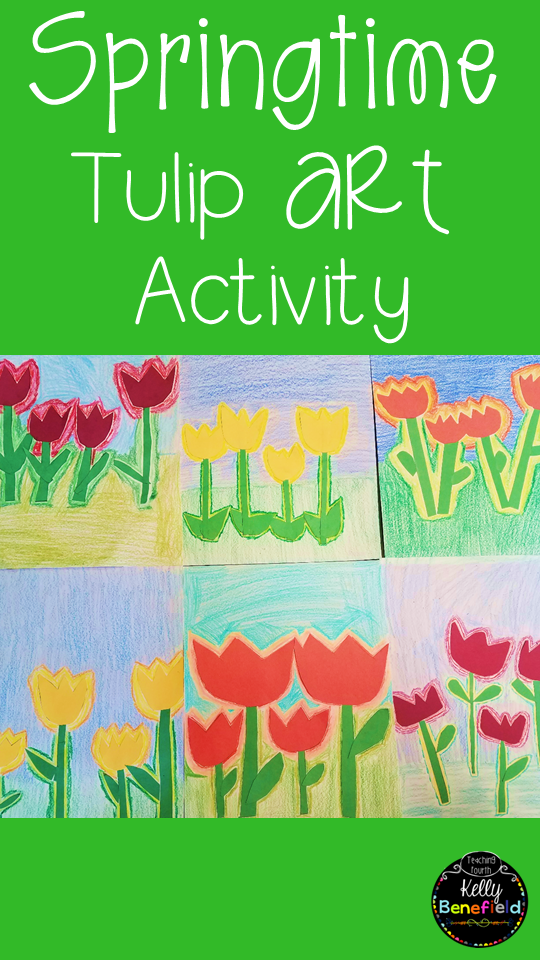
Spring fever has hit my classroom! I’m not talking about the feeling of restlessness and excitement (although, yes, that has hit, too…), but rather, a kind that includes spring art around our classroom. With spring fever in the air, it is the perfect time to create some colorful spring tulip art! My students absolutely enjoyed creating these beautiful spring tulip pictures to brighten up our room.
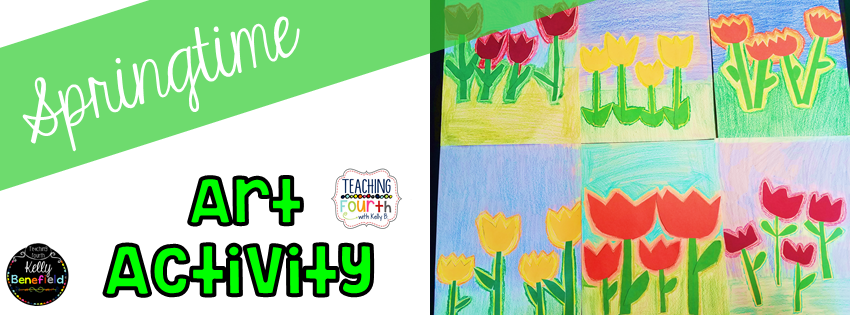
These colorful tulips are very simple to make and always turn out beautifully (even with a class full of art-challenged students). To make, first give each student one piece of white construction paper (9″x12″) or a piece of drawing paper, 1/2 sheet of yellow, orange, or red construction paper, and 1/3 sheet of green. Demonstrate how to draw a simple tulip shape. I always demonstrate this on the board and tell the students to draw a “u” shape. Then make a wide “W” shape to connect the top. Students will need to draw 2 larger tulips and 2 smaller tulips. This is the challenge: encourage students to make the larger tulips about the size of a mayo jar lid. In my experience, students always want to draw tiny tulips that are much too small for this art project. Once students have 4 tulips, then demonstrate drawing the shape of the tulip leaves. Students will need to cut out 4 stems and leaves for each tulip.
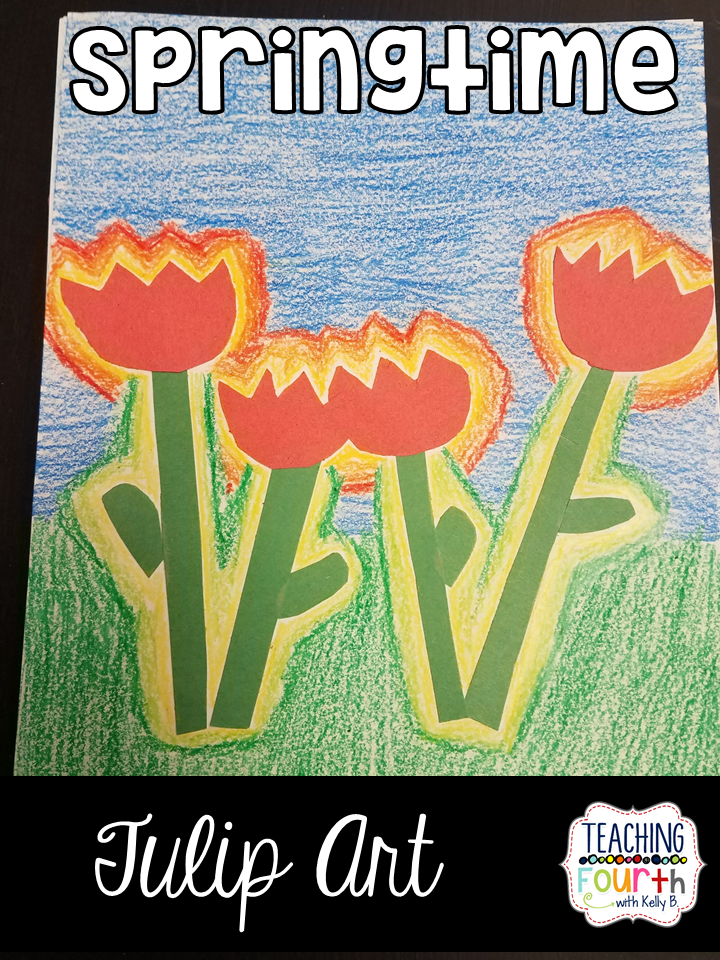
Once all of the pieces are drawn and cut out, students then assemble the tulips onto their paper and glue down. I usually simply show several examples of previous students’ work. (You could simply project some of the pictures from this page for the students to use as a guide). Now comes the fun part. Depending on the color of the tulips, students need 3 shades of that color crayon to match the construction paper. Beginning with the lightest shade (of red, orange, or yellow), color a thin area around each tulip shape. Then with the next darker, color around the area previously colored. Finally, color with the darkest shade. (See pictures) Repeat this process with the 2 or 3 shades of green around the stems and leaves. Finally, have students color the top 1/2 of the background blue and the bottom half green. Your students will have created a simple springtime masterpiece, and you will love how simple this spring art activity is!
Yes, when I grow up, I’d love to be an art teacher! ha ha! Until then, I’ll simply sneak in some fun art activities in my classroom when I can.
Have a very blessed day!